
I've inspected hundreds of used excavators for clients. I've walked auction lots from Phoenix to Houston. I've crawled under machines that looked beautiful on the outside and found cracks, patches, and $40,000 in hidden repairs.
Here's the hard truth: used equipment sellers are not lying to you. They're just not telling you everything. That "recently serviced" sticker on the boom? It means they changed the engine oil and wiped down the hydraulic tank. It doesn't mean they fixed the swing bearing that's been growling for 200 hours.
This checklist is the exact sequence I use when a client pays me to inspect a used excavator. I go in this order. I don't skip steps. And I don't trust the seller's story until I've verified it myself.
The 15-Point Inspection Sequence
1. Start with the paperwork — before you touch the machine
Pull the serial number. Run it through the manufacturer's system if possible. Check for outstanding recalls, service bulletins, or warranty transfers. Ask for maintenance records. If the seller can't produce any records for the last 500 hours, assume the machine hasn't been serviced in that time.
2. Walk-around visual — exterior condition
Look at the paint. Not for aesthetics — for clues. Mismatched paint on one side of the boom means repair work. Orange peel or overspray means they painted over something. Look at the glass, mirrors, and lights. These are cheap to replace but tell you how much care the previous owner took.
3. Bucket and linkage inspection
Check bucket teeth — are they worn evenly? Uneven wear means the operator ran it at an angle or the linkage is misaligned. Check the bucket linkage pins for play. Grab the bucket and try to move it side to side. Any more than 1/4 inch of movement means pin and bushing wear. Each worn pin costs $500–$1,000 to replace.
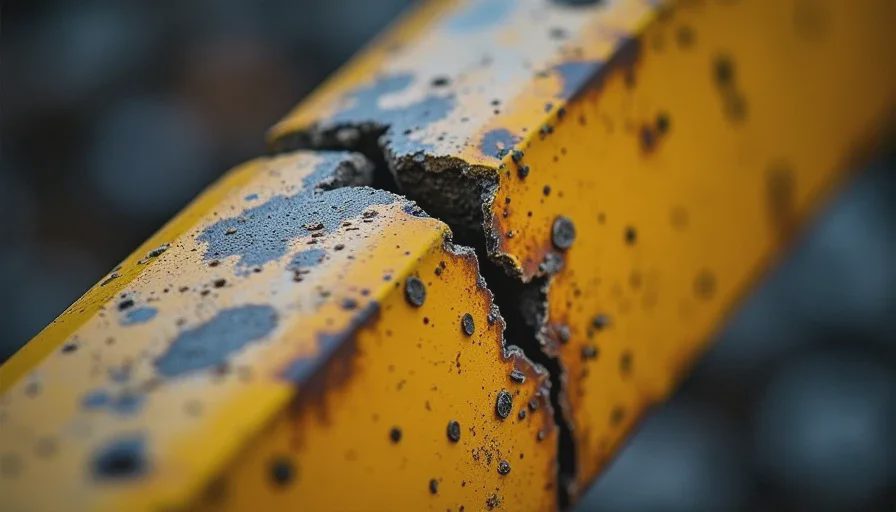
4. Boom and arm — cracks and welds
Run your hand along the underside of the boom and arm. Feel for weld beads that don't match factory — those are repair welds. Look for cracks at the pivot points, especially where the boom attaches to the frame. Use a flashlight and a mirror to check hidden areas. I've found cracks that were painted over to hide them.
5. Stick and bucket cylinder inspection
Look for scoring on the cylinder rods. Any deep scratches mean dirt ingress — and that dirt has been circulating through the hydraulic system. Check the seals for weeping. A small drip isn't a dealbreaker. A steady drip means the cylinder needs repacking — figure $800 per cylinder.
6. Undercarriage — the money pit
Get on your knees. Measure track sag — a properly tensioned track drops about 2 inches between the top roller and the idler. Check for missing or broken track pads. Inspect the sprocket teeth — if they're sharp or hooked, the sprocket is worn and will need replacement ($3,000–$5,000). Measure pin and bushing wear with a caliper. If the bushing is worn past 0.100 inches, the entire chain needs replacement. That's $8,000–$12,000 per side.
7. Final drives — listen and feel
Start the machine and warm up the hydraulics. Travel straight — if the machine pulls to one side, one final drive is weaker. Turn the machine in a circle in both directions — if it binds or makes grinding noise, the final drive planetaries are worn. Final drive rebuilds run $4,000–$7,000 each.
8. Swing bearing and swing drive
With the machine idling, swing the house left and right. Listen for grinding or popping. That means a failed swing bearing or worn swing gear. Then stop the swing and try to rock the cab by extending the boom — if the cab moves more than an inch side-to-side, the swing bearing has excessive play. Replacement cost: $10,000–$15,000 including labor.
9. Engine compartment — cold start and hot run
Open the hood. Look for oil leaks around the valve cover, turbo, and oil pan. Check the coolant level and look for any milky residue (head gasket failure). Start the engine cold — listen for knocking or excessive smoke. Once warm, check blow-by by loosening the oil filler cap — if air puffs out strongly, the rings are worn. Engine overhaul: $15,000–$25,000.
10. Hydraulic system — visual and functional
Look at the hydraulic tank — the sight glass should show clear oil, not milky or dark. Check the suction and return filters — cut them open if possible. Shine a light on the filter pleats — any metallic glint means internal wear. Then cycle all functions at idle and at full throttle. Time the boom raise, arm curl, and swing. Compare to the spec times — if it's more than 10% slower, the pump or main control valve is worn.
11. Pilot system and controls
Check the joysticks for free play — excessive looseness means worn pilot valves. Test the pattern control valve (if equipped) — some machines have a switch that changes operating patterns; if it's broken, that's a sign of electrical neglect. Feel the response — if there's a lag between stick movement and machine movement, the pilot pressure is low or the main pump is failing.
12. Electrical and display panel
Turn on the machine and go through every display page. Look for stored error codes — don't clear them until you've seen them. Test all lights, wipers, horn, and the backup alarm. Many sellers disconnect the backup alarm because it's annoying — but that's a safety red flag.
13. Air conditioning and cab comfort
Run the AC at full cold. If it's not blowing cold air, the compressor or condenser needs work ($1,500–$2,500). Check the heater too. A working HVAC system is not a luxury in Arizona — it's a necessity. Test the seat controls and the radio — these are minor, but they tell you about the previous owner's maintenance philosophy.
14. Track frame and belly pans
Crawl underneath. Look for cracks in the track frame where the final drive mounts. Check the belly pans for accumulated debris — packed dirt holds moisture and causes corrosion. Look for hydraulic leaks from hoses that are hard to see from the top. Any wetness under the machine deserves investigation.
15. Test drive — the final proof
Take the machine for a 20-minute test drive. Travel in high and low speed. Dig a full trench cycle — break out, lift, swing, dump. Pay attention to everything. Does the swing brake hold? Does the boom drift down when the engine is off? Does the travel motor auto-shift properly? If anything feels off, you're not imagining it.
Common Concealment Techniques
Here's what sellers do to hide problems — and how to see through it.
Paint over cracks: Use a magnet — if it doesn't stick over a painted area, there's body filler covering a crack or weld. Also, tap with a hammer — a dull thud means filler; a ring means steel.
Clean the undercarriage too thoroughly: A spotless undercarriage with fresh paint on the sprockets often means they've power-washed to hide leaks. Look for any wetness that reappears after a few cycles.
Fresh engine oil with an old filter: Pop the filter — if it's clean but the filter is dirty, they changed the oil but not the filter. That means they didn't change it at all — they just topped it up.
"Just serviced" means an oil change, not an inspection: A full service includes filters, fluids, and a detailed inspection. Ask for the service checklist. If they can't produce one, assume nothing was checked.
What "Recently Serviced" Actually Means
When a seller says "recently serviced," you should ask: "By whom?"
If by the seller's own mechanic: They may have just done the bare minimum to get it to start and move.
If by a dealer: Get the dealer's report — that's worth something. But even then, dealer inspections are not full durability reports.
If they can't show receipts: The service happened in their imagination.
My rule: A "recent service" doesn't reduce the price, but it does reduce the urgency. If the machine was genuinely serviced 50 hours ago, you have time to make informed decisions. If not, factor in a full fluids-and-filters service (about $2,000) into your budget.


00 Transmissions
No transmissions yet. Yours opens the channel.